When I was a child, holidays weren’t marked by decorations or presents—but by the scent of something magical drifting from my grandmother’s kitchen. She didn’t need store-bought gifts to show love. Her true gift? Her pies. Golden, flaky, and impossibly tender, they held memories in every bite.
The secret she passed down to my mom, and eventually to me, wasn’t anything fancy or hidden in a culinary book—it was Crisco. That blue tub of vegetable shortening became a symbol of reliability, ease, and unforgettable taste. Today, I’m sharing the very recipe that shaped generations of pie-making in my family. This isn’t just a Crisco pie crust recipe—it’s a guide to mastering a tradition that’s stood the test of time.
Whether you’re baking your first pie or perfecting your crust game, this article will walk you through every step—from essential tools to expert tips, common mistakes, and both sweet and savory customizations. So, let’s roll up our sleeves and dive into the art of the perfect Crisco pie crust recipe.
Looking for a creamy filling? Don’t miss our Blackberry Cheesecake Recipe to pair with your crust.
Why Choose Crisco for Your Pie Crust?
What Makes a Crisco Pie Crust Recipe Unique?
A Crisco pie crust recipe delivers consistency that butter alone sometimes can’t. Unlike butter, Crisco doesn’t melt as quickly when handled, giving you more working time without sacrificing flakiness. This plant-based shortening also has a neutral flavor, allowing your fillings—whether sweet or savory—to shine, a characteristic that fits well with dietary recommendations for fats from organizations like the U.S. Department of Agriculture (USDA) MyPlate.
The History of Crisco in American Baking
Crisco has been a pantry staple in American homes since 1911. It gained popularity during wartime for its shelf stability and has remained beloved for its ability to produce a flaky pie crust without the unpredictability of temperature-sensitive butter. Whether you’re recreating a family recipe or trying it for the first time, this ingredient brings decades of baking tradition into your kitchen.
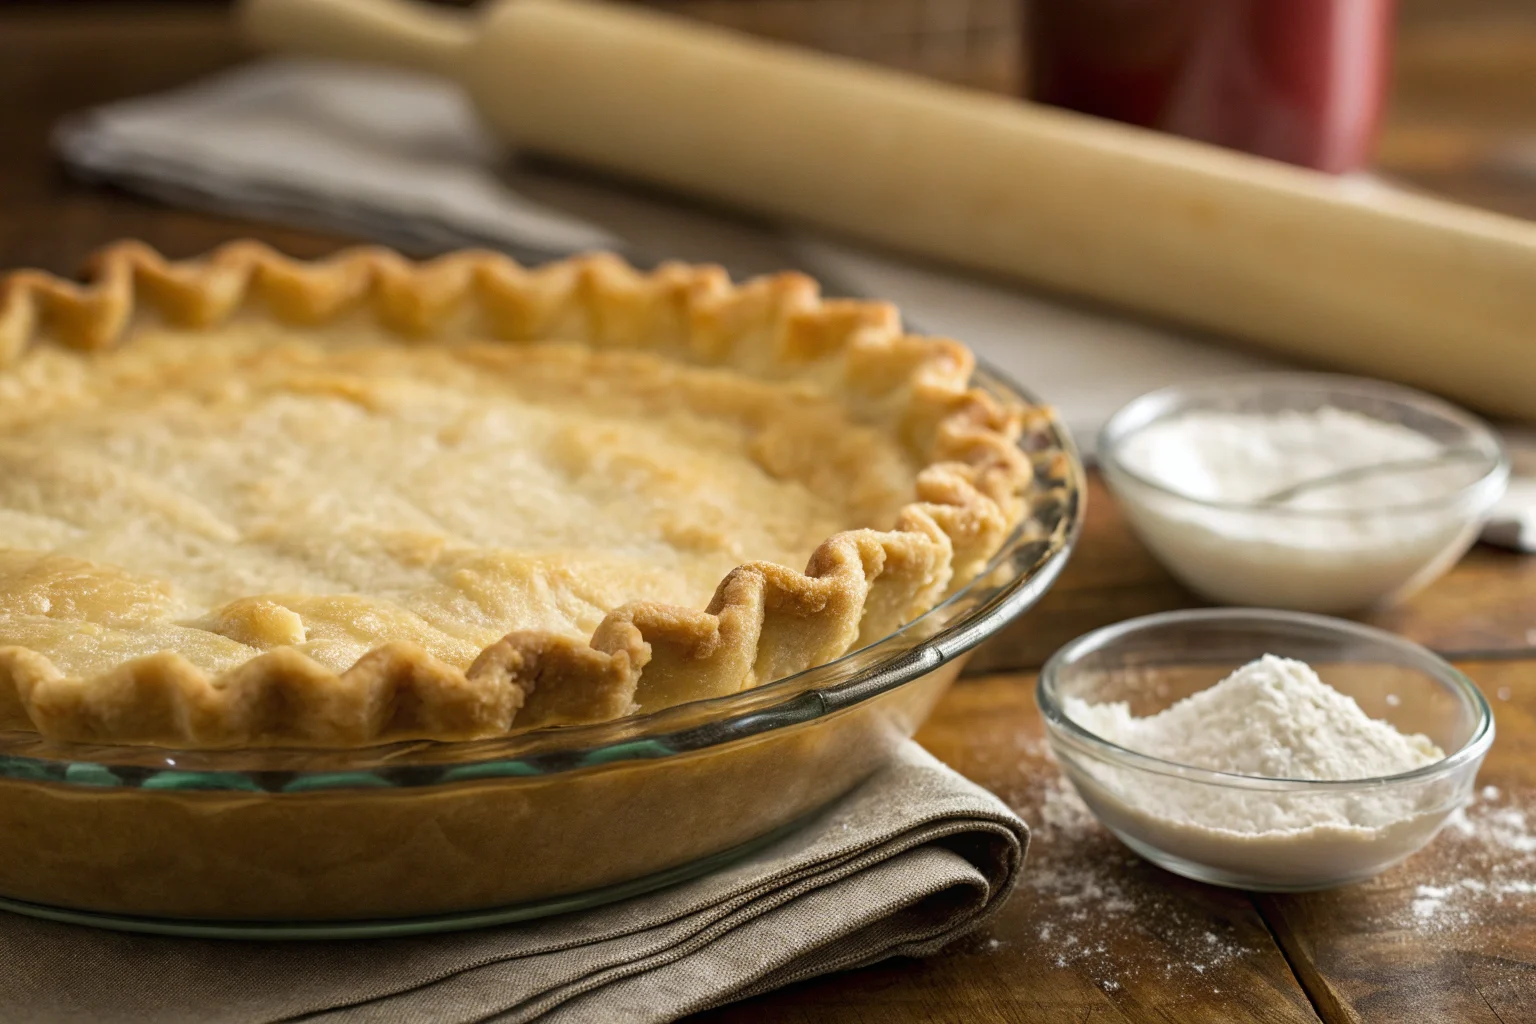
Perfect Crisco Pie Crust
Ingredients
Equipment
Method
- Prepare the Dry Ingredients: In a large mixing bowl, whisk together the sifted flour and salt. If making a sweet pie, add sugar at this stage.
- Cut in the Crisco: Add Crisco shortening and cut it into the flour using a pastry cutter or two knives. Work quickly until the mixture resembles coarse crumbs with pea-sized bits of shortening.
- Add Ice Water: Gradually add ice-cold water, one tablespoon at a time, tossing lightly with a fork after each addition. Stop when the dough holds together without being sticky.
- Form and Chill: Shape the dough into a ball, then flatten it into a disk. Wrap it in plastic wrap and refrigerate for at least 30 minutes.
- Roll Out the Dough: Lightly flour your work surface and rolling pin. Roll the dough from the center outward, turning occasionally, until it is about 1/8 inch thick and large enough to fit your pie pan.
- Transfer to the Pie Pan: Carefully roll the dough onto your rolling pin and unroll it into the pie pan. Gently press it into the bottom and sides without stretching. Trim excess dough, leaving about an inch of overhang.
- Crimp and Chill Again: Fold the edges under and crimp them using your fingers or a fork. Chill the shaped crust for 15 minutes to prevent shrinking when baking.
- Blind Bake (If Needed): If your recipe requires a pre-baked crust, line it with parchment paper and fill it with pie weights. Bake at 375°F (190°C) for 15 minutes, remove weights, and bake for another 5-7 minutes until golden.
- Fill and Bake: Proceed with your desired pie filling and baking instructions.
Nutrition
Notes
For a crispier crust, add a teaspoon of vinegar or vodka to the dough.
For a gluten-free version, use a gluten-free flour blend with xanthan gum.
Dough Storage: Wrap tightly in plastic and refrigerate for up to 3 days or freeze for up to 3 months.
Tried this recipe?
Let us know how it was!Essential Ingredients and Tools for Your Crisco Pie Crust Recipe
Key Ingredients for the Best Crisco Pie Crust Recipe

A great Crisco pie crust recipe starts with just a few simple ingredients, each playing an important role. First, you’ll need all-purpose flour, which provides the structure. Be sure to sift the flour for a consistent texture. Next comes the star of the show: Crisco All-Vegetable Shortening. Its unique texture helps create a tender yet firm crust to hold up to your filling.
Salt is another crucial ingredient, enhancing the crust’s flavor without overpowering it. Finally, ice-cold water is the secret to binding the dough without activating too much gluten. Add one tablespoon to maintain control over the dough’s texture.
Tools You Need for Perfect Crisco Pie Dough
Having the right tools makes all the difference. A large mixing bowl is perfect for combining your ingredients. A pastry cutter is a classic choice for incorporating the shortening into the flour, but a food processor works just as well if you’re in a hurry. You’ll also need a sturdy rolling pin to flatten the dough evenly.
Other helpful items include a silicone baking mat to prevent sticking and baking weights for blind baking. Don’t forget a pie pan—glass or ceramic is often preferred for its even heat distribution.
Step-by-Step Crisco Pie Crust Recipe
Preparing the Dough
Start by combining your dry ingredients—flour and salt—in a large bowl. Combine the ingredients thoroughly to ensure the salt is evenly distributed. Next, add the Crisco shortening, cutting it into the flour with a pastry cutter or two knives. Work quickly to avoid melting the shortening with your hands. You’re looking for a crumbly mixture with pea-sized bits of shortening.
Slowly add ice-cold water, one tablespoon at a time., tossing the mixture lightly with a fork after each addition. Stop when the dough holds together without being sticky. Form the dough into a ball and flatten it into a disk. Wrap it in plastic and refrigerate for at least 30 minutes.
Achieving the Right Consistency
Once chilled, the dough is ready to roll. Lightly flour your work surface and rolling pin. Roll the dough from the center outward, turning it occasionally to maintain an even thickness. If cracks appear, patch them gently by pressing the edges together. The dough should be about 1/8 inch thick and wide enough to fit your pie pan with some overhang.
Rolling and Shaping the Crust

Carefully roll the dough onto the pin and unroll it into your pie pan. Gently press the dough into the bottom and sides of the pan, being careful not to stretch it. Trim the excess dough, leaving about an inch of overhang. Fold the edges under and crimp them with your fingers or a fork for a decorative finish.
Once your crust is shaped and ready, you can bake it or fill it with your chosen ingredients. The Crisco pie crust recipe is versatile and works beautifully for sweet and savory pies.
Variations and Customizations OF Crisco Pie Crust Recipe
Sweet and Savory Options
The beauty of a Crisco pie crust recipe lies in its adaptability. For sweet pies, add a tablespoon of sugar to the flour mixture. This little touch enhances the crust’s flavor, making it perfect for fruit pies or custard-based desserts. On the other hand, if you’re making a savory pie like a quiche or pot pie, consider mixing in fresh or dried herbs such as thyme or rosemary. These simple additions elevate the crust’s taste without overpowering the filling.
Use cookie cutters to shape decorative patterns with any leftover dough for creative crust edges. These small details add visual appeal and make your pie stand out at the dinner table.
Gluten-Free and Vegan Alternatives
If you’re catering to dietary restrictions, don’t fret! You can substitute gluten-free flour blends for traditional flour, but use one that includes xanthan gum for elasticity. For a vegan version, Crisco works beautifully as it’s plant-based, meaning no changes are necessary to the shortening. Pair it with almond milk or apple cider vinegar instead of water for a slight twist in flavor.
Troubleshooting Common Issues for Crisco Pie Crust Recipe
Why Is My Crust Tough?
One of the most common problems with pie crusts is toughness. This usually happens when the dough is overworked during mixing or rolling. The key is to handle the dough as little as possible. Mix until the ingredients come together and roll gently to avoid activating too much gluten. If your dough feels dry or crumbly, add a teaspoon of cold water at a time to help it bind.
How to Avoid Shrinking During Baking
Shrinking can turn a perfectly shaped crust into a disappointing mess. Always chill your dough after rolling it out and placing it in the pie pan to prevent this. This helps the fat solidify and reduces shrinkage when the crust hits the oven. Pie weights during blind baking can also help keep the crust in place.
For a savory twist on using your pie crust skills, check out this easy chicken pot pie recipe for a comforting dish perfect for dinner.
Pro Tips for the Best Results FOR Crisco Pie Crust Recipe
Chilling the Dough: When and Why
Chilling the dough is one of the most straightforward yet essential steps in mastering a Crisco pie crust recipe. By refrigerating the dough before rolling, you allow the fats to firm up, which helps prevent the crust from becoming greasy. Additionally, chilling minimizes gluten development, resulting in a tender, flaky texture. After rolling the dough and fitting it into the pie pan, another quick chill keeps the crust from shrinking as it bakes.
For best results, chill the dough for at least 30 minutes after mixing and another 15 minutes after placing it in the pan. These small steps go a long way in achieving the perfect crust.
The Blind Baking Technique
If your recipe calls for a filling that doesn’t require much oven time, blind baking your crust ensures it stays crisp. To blind bake, line your crust with parchment paper and fill it with baking weights or dried beans. Bake it at 375°F for 15 minutes, then remove the weights and bake for another 5-7 minutes until golden. This method prevents soggy bottoms and keeps your pie looking professional.
Popular Recipes Using Crisco Pie Crust Recipe
Classic Apple Pie
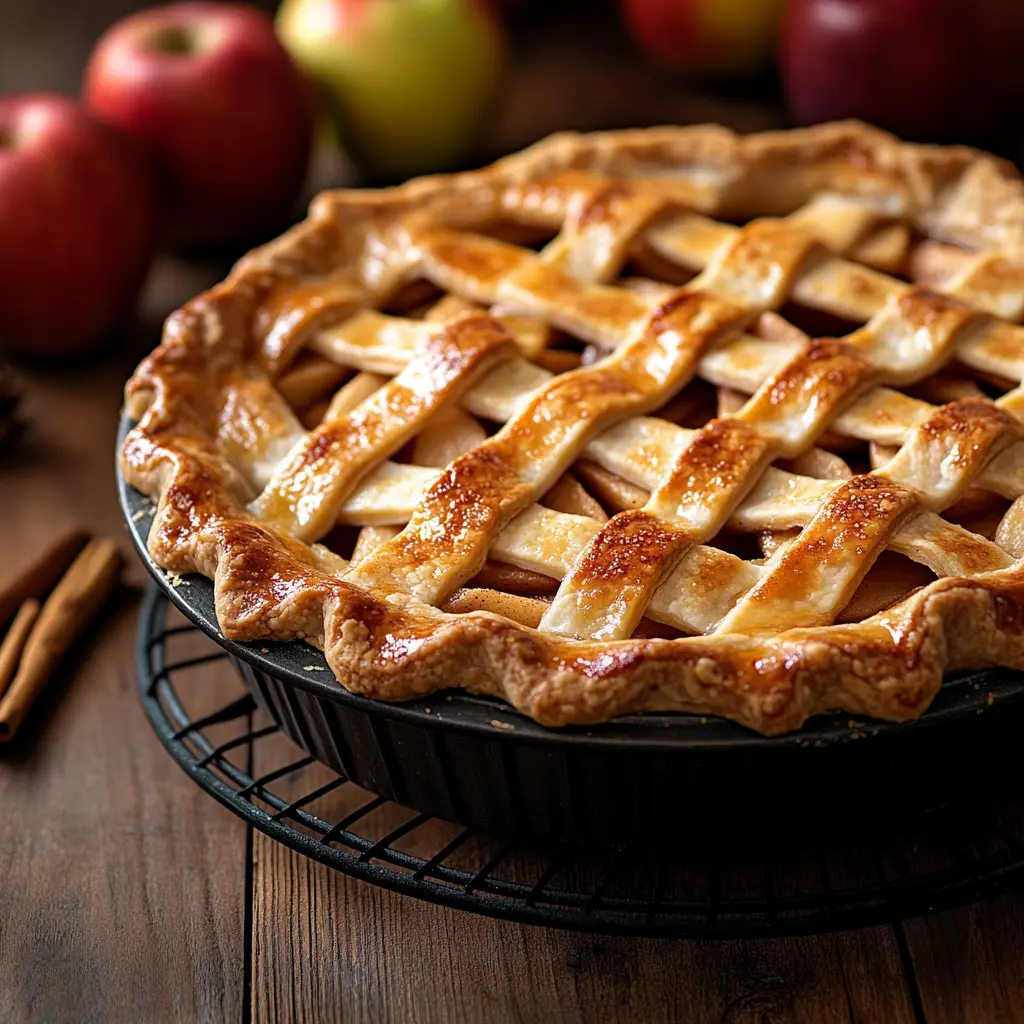
Nothing says comfort like a homemade apple pie, and a Crisco pie crust recipe makes it even better. The flaky, buttery-tasting crust pairs perfectly with sweet cinnamon-spiced apples. Roll out your crust, fill it with apple slices coated in sugar and spices, and cover it with a lattice or second crust for a timeless dessert.
Savory Chicken Pot Pie
Try using your Crisco pie crust for a heartier chicken pot pie. The rich, flaky crust complements a creamy filling with tender chicken, peas, and carrots. It’s an ideal dish for family dinners or special occasions.
FAQs About Crisco Pie Crust Recipe
Can I Substitute Butter for Crisco?
You can substitute butter for Crisco in a pie crust recipe, but it will change the texture and flavor. Butter provides a richer taste but may result in a slightly less tender crust than one made with Crisco. For the best results, some bakers mix butter and Crisco to get the ideal balance of flavor and flakiness.
How Long Does the Dough Last in the Fridge?
The dough for a Crisco pie crust recipe can be stored in the refrigerator for up to three days. Be sure to wrap it tightly in plastic wrap to prevent it from drying out. If you’re not planning to use it within that time, consider freezing it for up to three months. Thaw the dough in the fridge overnight before rolling it out.
Can I Freeze the Dough?
Absolutely! Freezing the dough is a great way to save time.Form it into a disk, wrap it in plastic, and store in a freezer bag. When ready to use, thaw it in the fridge and roll it out as usual.
What’s the Secret to Flaky Pie Crust?
The key to achieving a flaky crust is to keep the ingredients cold and avoiding overmixing. Cold Crisco, ice water, and a light hand while working the dough will give you layers of flakiness in every bite.
Conclusion: Mastering the Art of Crisco Pie Crust Recipe
Why Practice Makes Perfect
Making a perfect Crisco pie crust recipe takes some practice but is worth the effort. With each attempt, you’ll get better at balancing the dough’s consistency, rolling it evenly, and achieving the beautiful golden color that makes pies appealing. Don’t be afraid to experiment with variations or techniques to find what works best for you.
Your Go-To Recipe for Any Occasion
Whether baking a holiday dessert or preparing a comforting savory pie, this Crisco-based recipe is dependable. Its flaky texture and subtle flavor work well with a wide range of fillings, making it a versatile addition to your repertoire. Equipped with these helpful tips and techniques., you’re ready to impress family and friends with your homemade creations.