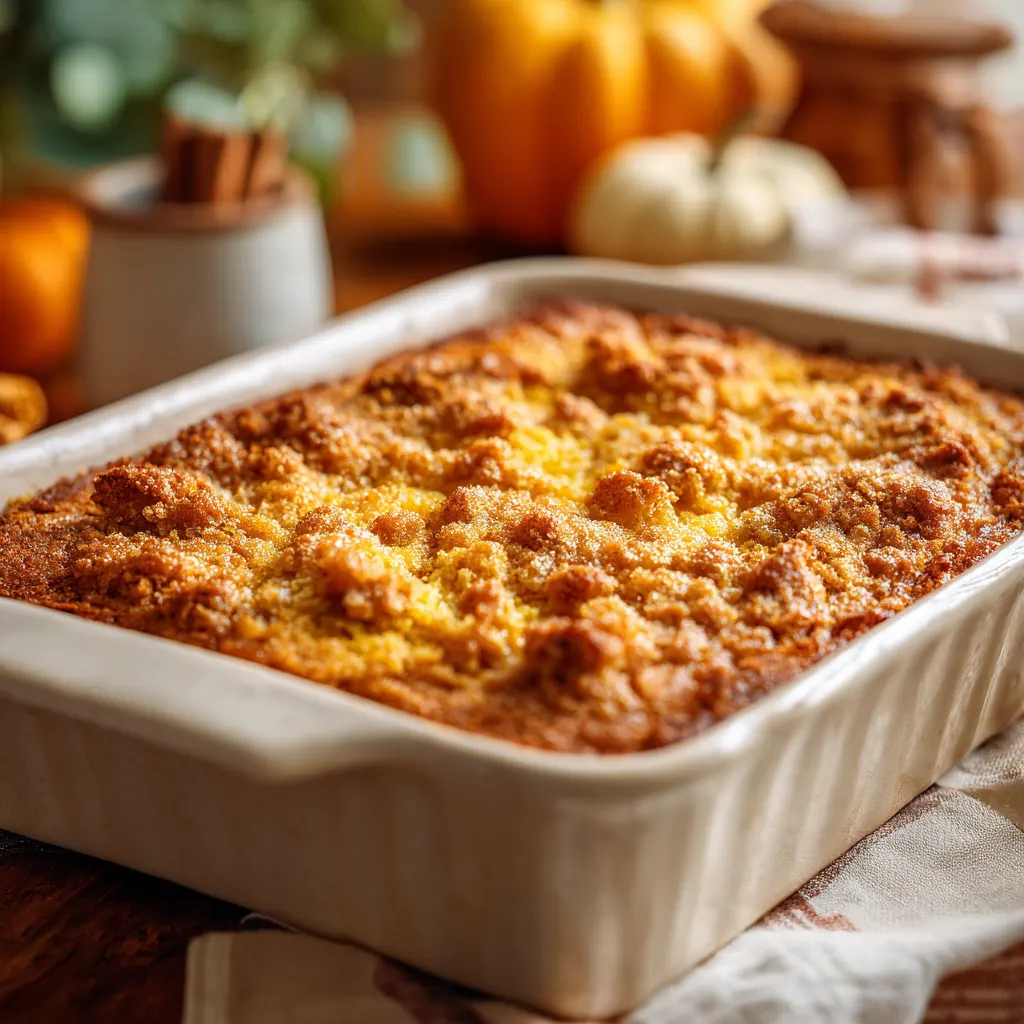
The first time I made a pumpkin dump cake, I couldn’t believe how simple it was. No mixing bowls stacked high, no complicated steps—just layers of pumpkin, spice, cake mix, and butter coming together in the oven. As it baked, the whole kitchen filled with the scent of cinnamon and nutmeg, the kind of aroma that makes you think of falling leaves and family gatherings.
What I love most about this recipe is how it delivers the comfort of pumpkin pie with half the effort. A creamy, spiced base, a buttery golden topping, and endless ways to serve it—warm with ice cream, or cool with whipped cream. It’s the kind of dessert that feels homemade without the stress, and it always brings people back for seconds.
What Is a Pumpkin Dump Cake?
A Simple Dessert with Big Flavor
At its core, a pumpkin dump cake is exactly what it sounds like—a dessert where you literally dump the ingredients into a pan, bake it, and let the oven do all the hard work. Think of it as the happy marriage between pumpkin pie and a buttery crisp. The bottom layer is smooth and custardy, made with pumpkin puree, sugar, and warm spices. The top? Golden, crunchy, and rich from cake mix and melted butter.
The Magic of “Dump” Baking
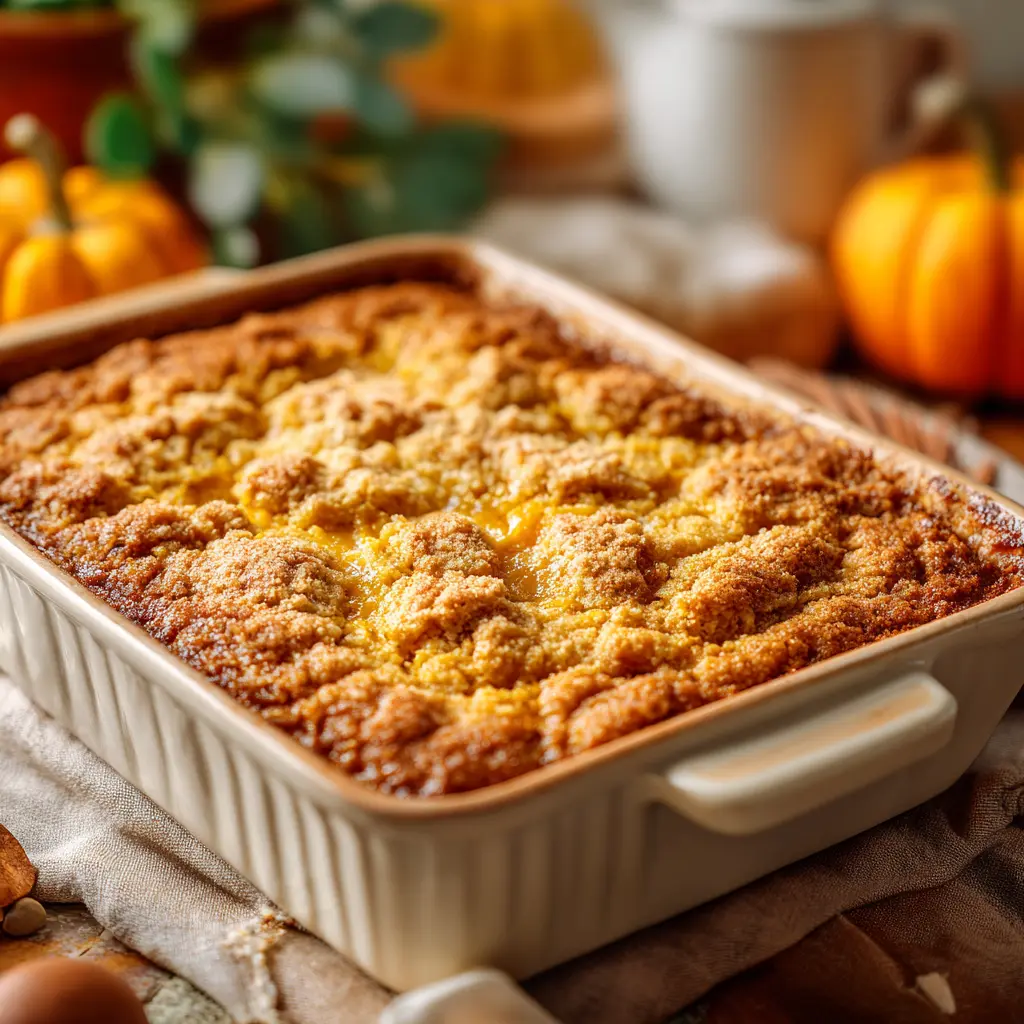
Unlike traditional cakes that demand careful mixing, dump cakes thrive on simplicity. You don’t stir the cake mix into the pumpkin base—you sprinkle it right on top. As it bakes, the butter seeps through the mix, creating a crumbly crust that contrasts beautifully with the creamy filling. The result is rustic, homey, and downright irresistible.
Why Pumpkin Makes It Perfect for Fall
Pumpkin brings more than just flavor—it’s the symbol of the season. Every bite of pumpkin dump cake carries that cozy blend of cinnamon, nutmeg, and cloves that instantly feels like autumn. It’s the kind of dessert you serve at Thanksgiving, at Sunday dinners, or even on a quiet weeknight when you’re craving something sweet and seasonal.
Pumpkin Dump Cake
Ingredients
Equipment
Method
- Preheat oven to 350°F (175°C) and grease a 9×13-inch baking dish with butter or nonstick spray.
- In a large bowl, whisk together pumpkin puree, evaporated milk, eggs, granulated sugar, brown sugar, pumpkin spice, and vanilla extract.
- Pour the pumpkin mixture into the greased baking dish and spread evenly.
- Sprinkle dry cake mix evenly over the pumpkin mixture. Do not stir.
- Drizzle melted butter evenly over the dry cake mix to cover as much surface as possible.
- Optionally, top with chopped nuts for extra crunch and flavor.
- Bake for 50–60 minutes or until the center is set and the top is golden brown.
- Let cool for 15–20 minutes before serving. Enjoy warm or cold with whipped cream or ice cream.
Nutrition
Notes
Tried this recipe?
Let us know how it was!Essential Ingredients for Pumpkin Dump Cake
Why Ingredients Matter
Even though a pumpkin dump cake is incredibly simple, each ingredient has a specific role. The creamy pumpkin base and the buttery, crisp topping only come together when the right balance of flavors and textures is used.
Key Ingredients Breakdown
| Ingredient | Role in Recipe | Possible Substitutes |
|---|---|---|
| Pumpkin Puree | Smooth base, adds flavor & moisture | Homemade puree, butternut squash puree |
| Evaporated Milk | Creates custard-like texture | Heavy cream, half-and-half, coconut milk |
| Eggs | Bind ingredients, help set filling | Flax eggs (vegan option) |
| Sugar (White & Brown) | Sweetness & depth of flavor | Coconut sugar, maple syrup, monk fruit |
| Pumpkin Spice | Brings warm fall flavors | DIY blend of cinnamon, nutmeg, cloves, ginger |
| Vanilla Extract | Adds aroma & richness | Maple extract, almond extract |
| Yellow Cake Mix | Forms crisp golden topping | Spice cake mix, gluten-free mix |
| Butter | Creates crunchy, buttery crust | Vegan butter, coconut oil |
| Nuts (Optional) | Adds crunch & nuttiness | Skip for nut-free version |

Pumpkin’s Nutritional Perks
Pumpkin isn’t just for flavor—it’s a nutrient powerhouse. According to USDA FoodData Central, 1 cup of cooked pumpkin (116 g) contains only about 30 calories, is rich in fiber, vitamin A (beta-carotene), vitamin C, and potassium, making it both delicious and wholesome.
Customizing for Dietary Needs
This recipe is easy to adapt:
- Gluten-Free: Swap the cake mix for a certified gluten-free version.
- Dairy-Free: Use coconut milk instead of evaporated milk and vegan butter instead of dairy butter.
- Low Sugar: Reduce sugar or use natural sweeteners like monk fruit or maple syrup.
This flexibility makes pumpkin dump cake a dessert anyone can enjoy.
Step-by-Step Instructions for Pumpkin Dump Cake
Preparing the Baking Dish
- Preheat the Oven – Set your oven to 350°F (175°C) so it’s ready when you are. A steady temperature is the secret to even baking.
- Grease the Dish – Use a 9×13-inch baking dish. Lightly coat it with butter or non-stick spray to prevent sticking and to make serving easier.
Making the Pumpkin Layer
- In a large mixing bowl, whisk together:
- 1 can (15 oz) pumpkin puree
- 1 can (12 oz) evaporated milk
- 3 large eggs
- ¾ cup granulated sugar
- ¼ cup brown sugar
- 1 ½ teaspoons pumpkin spice
- 1 teaspoon vanilla extract
- Pour the mixture evenly into your greased baking dish. This creamy base is what gives the pumpkin dump cake its pie-like flavor.

Adding the Cake Topping
- Sprinkle 1 box (15.25 oz) yellow cake mix evenly over the pumpkin mixture. Do not stir—the layers should stay separate.
- Melt ¾ cup unsalted butter and drizzle it over the cake mix. Make sure to cover as much surface as possible. If you prefer a richer topping, use up to 1 cup of butter.
- Optional: Add ½ cup chopped pecans or walnuts for extra crunch.
Don’t miss our Crisco Chocolate Chip Cookie recipe if you’re craving another easy, nostalgic dessert with a buttery finish.
Baking Time and Tips
- Place the dish in the oven and bake for 50–60 minutes.
- How to check doneness:
- The center should be set but may have a slight jiggle.
- The topping should be golden and crisp.
- A toothpick should come out mostly clean.
Cooling and Serving
- Let the cake cool for 15–20 minutes before slicing. This allows the pumpkin layer to firm up.
- Serve warm with a scoop of vanilla ice cream or a dollop of whipped cream. For an extra treat, drizzle with caramel sauce.
Common Mistakes to Avoid When Making Pumpkin Dump Cake
Why Baking Mistakes Matter
Even though a pumpkin dump cake is one of the easiest fall desserts to make, a few missteps can turn it soggy, dry, or uneven. Knowing what to avoid ensures you’ll get that perfect creamy base with a golden, buttery crust every time.
Biggest Mistakes and How to Fix Them
| Mistake | Why It Happens | Quick Fix |
|---|---|---|
| Stirring the Cake Mix Into the Pumpkin Layer | Layers blend, leaving no crisp topping | Simply sprinkle mix on top—never stir |
| Not Using Enough Butter | Dry, powdery topping | Drizzle melted butter evenly, cover all dry spots |
| Overbaking or Underbaking | Too runny or too dry | Bake 50–60 mins at 350°F; test with a toothpick |
| Using Extra-Moist Cake Mix | Makes dessert soggy | Stick with yellow, spice, or white cake mix |
| Not Letting It Cool Before Serving | Filling stays loose, messy slices | Rest cake 15–20 mins before cutting |
Chef’s Tip for Success
The number one rule? Do not stir the cake mix into the pumpkin base. The magic of dump cake comes from the distinct layers—the creamy custard underneath and the crisp, golden topping above.
Learn more about texture balance with our Classic Quaker Oatmeal Cookie Recipe, where chewy centers meet crisp edges.
Final Word on Mistakes
If your cake turns out too runny, don’t panic—just return it to the oven for another 10 minutes. If it’s too dry, drizzle a bit of melted butter on top before serving. These quick fixes can save almost any pumpkin dump cake mishap.
Why Is My Pumpkin Dump Cake Too Moist? (Troubleshooting Guide)
The Moisture Challenge
Sometimes your pumpkin dump cake may come out too wet or soggy. This usually happens when there’s too much liquid in the pumpkin layer, underbaking, or using the wrong type of cake mix. Luckily, these issues are easy to fix once you know what to look for.
Common Causes of Excess Moisture
- Too Much Liquid in the Pumpkin Mixture – Homemade pumpkin puree often has more water than canned.
- Underbaking – Pulling the cake out too soon leaves the filling runny.
- Improper Cooling – Slicing before the cake has set can make it look soupy.
- Wrong Cake Mix – Extra-moist or pudding-added cake mixes hold too much water.
Quick Fix Table
| Problem | Cause | Solution |
|---|---|---|
| Too Runny | Underbaked or excess liquid | Bake 10–15 mins longer, strain puree if homemade |
| Too Wet | Wrong cake mix used | Stick with yellow, spice, or white cake mixes |
| Soggy Texture | Didn’t cool enough | Let rest at least 20 mins before slicing |
| Watery Base | Too much milk/eggs | Measure ingredients precisely |
Chef’s Pro Tips
- If using homemade pumpkin puree, strain it through a cheesecloth to remove excess water before baking.
- Always let the cake cool so the custard-like base can set properly.
- A light dusting of cinnamon sugar on top can help absorb surface moisture and add extra flavor.
Final Word on Moisture
Don’t worry if your pumpkin dump cake looks a little too soft at first. Once it cools, it usually firms up. If not, a few extra minutes in the oven almost always saves the day.
Best Toppings and Serving Suggestions
The Joy of Toppings
A warm slice of pumpkin dump cake is already comforting, but the right topping can take it from cozy to unforgettable. From creamy additions to sweet drizzles, the options are endless.

Whipped Cream vs. Ice Cream
| Topping | Why It Works | Best For |
|---|---|---|
| Whipped Cream | Light and airy, balances richness | Quick weeknight dessert |
| Vanilla Ice Cream | Creamy, melts into the warm cake | Fresh out-of-oven serving |
| Cinnamon Whipped Cream | Adds spice and warmth | Holiday gatherings |
| Pumpkin Spice Ice Cream | Doubles down on pumpkin flavor | Pumpkin lovers |
Flavor Enhancers
- Salted Caramel Drizzle – Sweet and salty balance.
- Maple Syrup – A natural, fall-inspired topping.
- Chocolate Sauce – A twist for chocolate fans.
- Toasted Pecans – Adds crunch and nuttiness.
Don’t miss our Easy Chocolate Bun Recipe for another dessert that pairs beautifully with ice cream.
Perfect Drink Pairings
- Pumpkin Spice Latte – Enhances pumpkin flavor.
- Chai Tea – Spices that complement the cake.
- Hot Apple Cider – Fruity warmth for fall.
- Espresso or Coffee – Cuts through sweetness.
Chef’s Serving Tip
If you’re hosting a holiday dinner, create a pumpkin dump cake dessert bar with bowls of toppings like caramel drizzle, whipped cream, chocolate sauce, and nuts so everyone can customize their slice.
How to Store and Reheat Pumpkin Dump Cake
Do You Need to Refrigerate Pumpkin Dump Cake?
Yes. Since this dessert contains eggs and dairy, it should not be left at room temperature for long. According to the FDA Food Safety Guidelines, desserts with milk or eggs should be refrigerated within two hours of baking to prevent bacteria growth.
How to Store Properly
- Allow the cake to cool completely.
- Cover the baking dish tightly with foil or plastic wrap, or transfer slices to an airtight container.
- Store in the refrigerator for up to 4 days.
Freezing Pumpkin Dump Cake
- Let it cool fully before freezing.
- Cut into portions for easy reheating.
- Wrap slices in plastic wrap, then store in a freezer-safe bag.
- Keeps well in the freezer for up to 3 months.
Best Reheating Methods
| Method | How to Do It | Best For |
|---|---|---|
| Oven | 350°F for 15–20 mins (covered with foil) | Restores crispy topping |
| Microwave | 30–45 seconds per slice | Quick single servings |
| From Frozen | Thaw overnight, then bake 10 mins at 350°F | Best for larger portions |
Chef’s Pro Tips
- For extra flavor, place a small pat of butter on top before reheating.
- If microwaving, note that the topping will soften instead of staying crisp.
Pumpkin Dump Cake Variations
Why Variations Work So Well
One of the best things about a pumpkin dump cake is how flexible it is. With just a few swaps, you can make it gluten-free, dairy-free, or even add new flavors to surprise your guests.
Popular Variations Table
| Variation | What to Change | Flavor Twist |
|---|---|---|
| Gluten-Free Pumpkin Dump Cake | Use gluten-free yellow cake mix | Same classic taste, celiac-safe |
| Dairy-Free Pumpkin Dump Cake | Swap evaporated milk for coconut milk & butter for vegan butter | Creamy with a hint of coconut |
| Nutty Pumpkin Dump Cake | Add chopped pecans or walnuts on top | Extra crunch & flavor |
| Chocolate Pumpkin Dump Cake | Sprinkle chocolate chips into the filling or topping | Pumpkin + chocolate decadence |
| Maple-Pecan Pumpkin Dump Cake | Replace sugar with maple syrup & add candied pecans | Rich, fall-inspired sweetness |
| Streusel-Topped Pumpkin Dump Cake | Replace cake mix with homemade streusel (flour, oats, butter, sugar) | Bakery-style crumb topping |
Creative Add-Ins
- A swirl of cream cheese for a cheesecake vibe.
- Dried cranberries for tartness.
- Caramel drizzle before baking for gooey richness.
Looking for inspiration? Try our Matcha Muffins with Almond Flour for another fun baking twist that’s lighter but still indulgent.
Chef’s Pro Tip
When experimenting with variations, always balance sweetness and spice. Too many sweet add-ins can overpower the pumpkin flavor, while extra spices like cinnamon or ginger can elevate it beautifully.
FAQs About Pumpkin Dump Cake
What is the biggest mistake to avoid when making a dump cake?
The biggest mistake is stirring the cake mix into the pumpkin filling. A dump cake works because the layers remain separate—the pumpkin base stays creamy while the cake mix bakes into a crisp topping. Always sprinkle the mix evenly and drizzle butter on top without mixing.
Why is my pumpkin dump cake too moist?
Excess moisture often comes from using fresh pumpkin without draining it, underbaking, or adding too much liquid. To prevent this, follow ingredient measurements exactly, bake for at least 50–60 minutes, and let the cake cool before slicing.
Should dump cake be refrigerated?
Yes. Since pumpkin dump cake contains eggs and dairy, it must be refrigerated once cooled. Store covered in the fridge for up to 4 days. For longer storage, freeze individual slices for up to 3 months.
Which pumpkin is best for cakes?
Canned pumpkin puree is the easiest and most reliable option. If using fresh pumpkin, stick with sugar pie pumpkin, Cinderella pumpkin, or Long Island cheese pumpkin for their smooth, sweet texture. Butternut squash also works as a substitute.
How can I fix a runny or dry dump cake?
Too runny? Bake an extra 10–15 minutes.
Too dry? Drizzle melted butter on top.
Powdery topping? Make sure butter is evenly distributed before baking.
What’s the best way to serve pumpkin dump cake?
Pumpkin dump cake is best enjoyed warm, topped with whipped cream or vanilla ice cream. For a holiday twist, add caramel drizzle, cinnamon whipped cream, or candied pecans.
Conclusion & Final Baking Tips
At the end of the day, a pumpkin dump cake is proof that the simplest desserts can bring the most joy. With its creamy spiced filling and buttery golden topping, it’s the kind of treat that feels like a hug on a chilly fall evening.
Final Chef’s Tips for Success
- Don’t stir the layers — let the pumpkin and cake mix stay separate for the best texture.
- Use enough butter — it ensures a crisp, golden crust instead of a dry topping.
- Bake long enough — 50–60 minutes at 350°F gives the pumpkin layer time to set.
- Let it cool before serving — this helps the filling firm up and makes slicing easier.
- Store it right — refrigerate leftovers within two hours and enjoy for up to 4 days.
Whether you’re making it for Thanksgiving, a fall potluck, or just a cozy weeknight dessert, this recipe is as forgiving as it is delicious. Serve it warm with ice cream or cool with whipped cream, and you’ll have a crowd-pleasing dessert that captures the very best of autumn.
And if you’re ready for more seasonal inspiration, check out our Blueberry Cobbler Recipe — another easy fruit-forward dessert that’s just as comforting year-round.